Phoenix Dawn Command: The Final Mission
In 2015 Twogether Studios released its first game: the card-based RPG Phoenix Dawn Command, designed by Keith Baker and Dan Garrison. Phoenix deals with a world faced by an existential supernatural threat. The player characters are Phoenixes, people who have died and returned to life imbued with supernatural power. With every death they grow stronger—but they can only return seven times. As released in 2015, Phoenix includes a seven-mission story arc. But Dan and I had developed on an eighth mission designed to serve as a "season finale", setting up a second act of the story. As it turned out, an RPG wasn't the best choice for a first product for a two-person company, and it wasn't economically feasible to produce new content. As a result, this mission was never released, and has been sitting on my computer just-not-quite-done. When someone asked me about Phoenix recently, I remembered this mission and decided to finish it and share it with patrons. So, if you have never played Phoenix Dawn Command, this may be fairly incomprehensible—but for all you Phoenix players out there, I hope you enjoy this final story. And who knows? Perhaps we'll revisit Phoenix in the future...
MISSION 8: OMEN
By Keith Baker and Dan Garrison
In Omen, the Phoenixes arrive in the Capital for an audience with the Emperor. Before the meeting, the Capital is struck by a new manifestation of the Dread. The Phoenixes race to the palace to protect the Emperor, but the rogue Phoenix Omen is already there. It’s time for a reckoning - but will the Phoenixes kill Omen, or find another solution?
Omen is a short adventure, but the action will shake the Empire. Omen’s goals are revealed: will the Phoenixes oppose him, or do his ideas make sense? Will the Emperor survive? This is intended to serve as a season finale: it answers many questions that have been building over the last few adventures, but it raises many new issues that will have to be dealt with in the future. If you aren’t ready for a dramatic confrontation that can serve as a good stopping point for a campaign, feel free to postpone this mission and to introduce additional missions of your own design before running this; this mission can begin at any point when the Phoenixes are traveling to the Capital after a successful mission.
Background
After the Civil War, the Empress Justice abdicated the throne. The Humanist leaders established a mortal Emperor to facilitate a smooth transition, but the powers of the office were substantially reduced. True power rests with the Senate and hierarchy of Ministers, but the Emperor serves an important symbolic role and acts as the voice of the Empire. The current Emperor is Maelan Dolanti, who took the throne after his mother Malita passed away. While he’s young, he’s seen as a brave and honorable man and the common people still look to him to find an answer to the Dread.
While the Emperor is the figurehead, it’s the Speakers who run the Empire. The Senate is split by province, and each province has a Speaker to serve as their primary voice in the Empire. Each Speaker holds a secondary cabinet post - so Cassala Deosa is both the Speaker for Ilona and Minister of Philosophy. In times of emergency the Speakers and the Emperor retreat to the heart of the Imperial Palace, ensuring that the leadership of the Empire stands together in the safest possible place… at least in theory.
The Shrouded Phoenix Omen believes that the Phoenix Imperium must be restored. To accomplish this, he is willing to smash the old order… but he’d prefer to subvert it. He wants the Emperor and the Speakers to formally restore the Phoenix Imperium, ceding control of all Imperial forces to Phoenix command. To help set this in motion, he’s brought a pod of Guhani War-Wyrms to the city, knowing this will trigger a response from the Antediluvian; the ensuing chaos highlights the inability of the mortal forces to face the Dread and brings the leadership into one place.
Prologue: Arriving in the Capital
Following the events of The Siege, the wing has traveled to the Capital by boat. Throughout this mission, descriptions presume that the Phoenixes triumphed in Cartacia during The Siege. If the final Fortification Value in The Siege was 15 or below, adjust any exuberant behavior to a growing sense of despair. The Phoenixes will still be sent to talk to the Emperor to provide a first-hand account of the battle with the Bones, but they won’t receive a hero’s welcome if they failed to save Cartacia. With this in mind, read or paraphrase the following.
Following the siege of Cartacia, you received orders to travel to the Imperial Capital as quickly as possible. The last time you were in the Capital the dominant mood was one of fear and despair. The army was preparing to purge Darhold with fire and there was the sense that the defeat was inevitable. Most people didn’t recognize you as Phoenixes, or believe in your ability to make a difference. When you disembark at the Capital docks, you find yourself in a much different city. There is lively chatter on the streets, and even laughter in the air. You see a few Dawn Command banners - many obviously home-made - hanging from windows. And those people who recognize you as Phoenixes respond with wonder and awe.
The Flamekeeper Eudokia is waiting for you in the Aerie, and she demands an account of the battle. “You wouldn’t believe the things people are saying. Did you really choke a giant to death with your own bodies?”
The Phoenixes met Eudokia Parsa in Chants & Whispers. She was an optimist in their first encounter; now she’s positively glowing. Take a moment to relay some colorful accounts of the events of The Siege. If an Elemental brought down the Carrion Birds, the stories say that they filled the entire sky with fire or that they plucked the sun itself out of the sky. Any alliances they made will be greatly exaggerated, as will the final defeat of the Bone army. People don’t really know why the Bones collapsed, so there’s tales in which the Phoenixes who faced Hadon singlehandedly slaughtered the entire legion of Bones. If a Phoenix emulated Justice in some way, there may be stories that the Last Empress herself returned to fight the Bones. It’s flattering, but it does set the bar very high… what do they do next? Which is when Eudokia gets around to relaying their actual mission.
“I’m sorry, I should have told you right away. We have a message from Pyre. You’re to report to the palace immediately. You have an audience with the Emperor! You’re supposed to brief him on the events that took place at Pyre, and, um, ‘establish a protocol for Phoenixes to work with the Imperial Army moving forward.’ I’ve already sent a messenger to the palace to see when the meeting can happen.”
The message comes from Winter. Thanks to the victory at Cartacia, no one can deny the vital role the Phoenixes are playing in fighting the Dread; it’s time to establish a clear working relationship between Dawn Command and the Empire, especially the military. Winter doesn’t expect the wing to get too involved in the details. But they are the heroes of the hour, and she wants them to place the issue on the table and pave the way for a formal alliance.
At this point, the Phoenixes will probably have questions. Who IS the Emperor, anyway? Refer to the Mission Briefing section as necessary. This is a good time to establish the wing’s opinions about the Empire and its current government. How did it impact them in their first life? Do they care? Are they loyal supporters of the Empire, or do they want a change? Meanwhile, Eudokia will fuss about etiquette and appearance, inquiring if Phoenixes can change their Uniforms. “I don’t care if it’s the armor you died in. You can’t possibly attend an Imperial audience dressed like that.”
The messenger soon returns with an Imperial envoy named Tal. The Emperor is eager to meet the heroes of Cartacia, and they should come to the palace as quickly as possible. Tal will serve as their guide and escort them through the Palace. Take a moment and have the players establish details about Tal: gender, age, any significant details. if you prefer to avoid this, Tal is an old man wearing Imperial livery. He was a drill sergeant in his younger days, and while he is friendly he has a sharp tongue and expects the Phoenixes to fall in line. He clearly doesn’t believe all the stories people are spreading.
As soon as the wing is ready, Tal leads them into the streets of Cartacia. Proceed to the next scene.
MISSION BRIEFING: THE EMPIRE
These questions could come up during the prologue or in later scenes.
How’s the Empire organized?
Despite the name, the Empire has effectively been a republic ever since the end of the Civil War. The Dol Talu were established as the Imperial line and have ruled ever since, but the Emperor is a symbolic role. The key functions of the Empire are overseen by the Senate. Each province appoints senators, and each delegation of senators appoints a Speaker who serves as their primary voice in the Empire. In theory the Speakers advise the Emperor, but in practice they have more power than he does. The Emperor does have the power to break deadlocks within the Senate and in theory is the ultimate commander of the military, but that authority has rarely been invoked.
Who’s the Emperor?
Maelan Dolanti. He ascended to the throne in the very first days of the Dread; some say that it was the mysterious death of his mother - the Empress Malita - that set the Dread in motion. Traditionally, a young heir is always appointed to the throne so they can be shaped by the Empire; at the time there was no obvious reason to break with this custom. While young, Maelan is charismatic and intelligent, and has done his best to inspire the people while staying out of the way of the Speakers and Ministers.
If a Phoenix has a Talu background or Specialties in the Empire or Lore, you can add the following information. It’s not directly relevant here, but it’s useful crabgrass if you plan to use the House God challenge at some point in the future.
The custom of appointing a youth to the throne is based on old Talu traditions. The power of the old Talu came from their House Gods, and these spirits would only bond with children; the child would be shaped by the god as they grew. The Empire is shaped by the traditions of all provinces, but the Imperial line is a Talu family and this custom has held.
Who are the Speakers?
The Speakers are the most influential senators, appointed by their delegation to speak on behalf of their provinces. Most Speakers are also Ministers, charged with overseeing a critical element of the Empire. While they are officially Imperial advisors, in practice this simply means they tell the Emperor what is going on as opposed to asking for his opinion. Speakers serve a two-year term. Often they are career politicians, but occasionally a young prodigy can rise to the role.
If a Phoenix has a Talu background or Specialties in the Empire or Lore, you can add the following information.
The current Speaker for Ilona is such an individual: Though young, Cassala Deosa is celebrated for her skills as an orator and philosopher. She’s recently been betrothed to the Emperor. These achievements are doubly surprising as her family - the Deo Talu of Cartacia - are traditionally more involved in crime than in politics. Some say that Cassala’s success is due to malign manipulations on the part of her family, but those who know her dismiss such claims as slander.
How do most people feel about the Emperor and the Empire?
The Empire has been a benign force since the days of the Civil War. There have always been tales of corruption, of Talu conspiracies and Skavi holds threatening to secede, but in practice most people have been content with it. The Emperor serves an important symbolic role. The Emperor has always been especially popular within Ilona, as the Imperial line is an old Ilonan family; nonetheless, the Dol Talu have done their best to speak to the needs of all the people of the Empire. It may not have been a perfect system, but it wasn’t bad.
The Dread has exposed cracks in the system. The Empire doesn’t have the resources to protect everyone. The fact is that there’s simply no way that the army could deal with most of the threats of the Dread, but this hasn’t stopped people from complaining that their province is being ignored in favor of others - especially the Wynderi, whose homeland has been entirely lost to the Dread. Talks of Skavi secession have grown louder, and there have been stories of the Imperial Army exceeding its authority and ruthlessly massacring civilians thought to be carrying some element of the Dread. Many still believe in the Senate and the Emperor, but others feel it’s only a matter of time before the system collapses.
SCENE ONE: OMENS OF WAR
Read or paraphrase the following.
You make your way through the streets. Tal carries a staff bearing the Imperial banner. Any time you encounter congestion, Tal brandishes the staff and barks an order and people rush out of your way.
You’re about halfway to the palace when a tremor shakes the ground beneath your feet. You hear screams and the sound of falling masonry in the distance. The call of a warhorn fills the air, and within seconds the sound is echoed from multiple points around the city. “That’s the Dread warning,” Tal says, eyes wide. “Something’s loose in the city. People are supposed to find shelter immediately.”
All around you, the common folk are rushing to clear the streets. Another tremor shakes the ground, and the distant screams continue.
A Phoenix with the War Specialty (or if no one has War, one with The Empire or Lore) can recognize the calls of the horns. The horns provide no details about the nature of the threat, but they identify the focal point as a few blocks from the Phoenix’s current location - and directly between the Phoenixes and the palace. A Phoenix with Observation, Scouting, or Supernatural Senses notes rising clouds of smoke and plaster dust; at least one building has collapsed.
This particular threat has a nose for Phoenixes, and a War Wyrm will seek them out wherever they go. They may choose to join the mortals taking shelter, to charge directly for the sound of battle, or try to go around the trouble and continue to the palace. Read or paraphrase the following, adjusting as necessary to fit their actions.
The tremors come again, and the screaming rises. Then something strange happens. There’s a flash of light, as the streets ahead of you are filled with a brilliant web of violet lightning. The effect only lasts an instant, and when it fades the screaming dies with it. You hear the sounds of the distant warhorns, but the one that was calling ahead of you has gone silent.
The Phoenixes couldn’t see the source of this lightning, but it covered a wide area (approximately a half mile radius, if anyone tries to make an estimate). If the Phoenixes approach the affected area, they see that the street and the buildings are covered with fine, weblike threads of black glass. Soon they see the more dire effect: all the people caught in this burst have been transformed into obsidian statues. They see a child frozen in glass, his hand outstretched towards the open door of his home. A dozen soldiers were caught in the blast as they rushed towards the source of the danger. A few glass birds have fallen from the sky to shatter on the cobblestones below. The effect penetrated the walls of buildings, and the houses and shops where people sought shelter are filled with obsidian corpses. A Phoenix who makes an Intellect Spread (Difficulty 15; Arcane, Lore) can confirm that the lightning was a powerful magical effect that caused this transformation; there’s no reversing it, and all the mortals caught in the blast are dead. They’ve never seen a magical effect unleashed on this scale, and don’t have anything else to work with.
If they continue on, they come to a wide plaza. Read or paraphrase the following.
Statues are scattered around the square, soldiers and fleeing commoners frozen together in silent glass. On the far side of the plaza you see the remains of a Talu hold, clearly shattered from within. There’s a massive creature in the remnants of the ruin, some sort of huge serpent or grub; it seems to be formed of solid obsidian.
SETUP
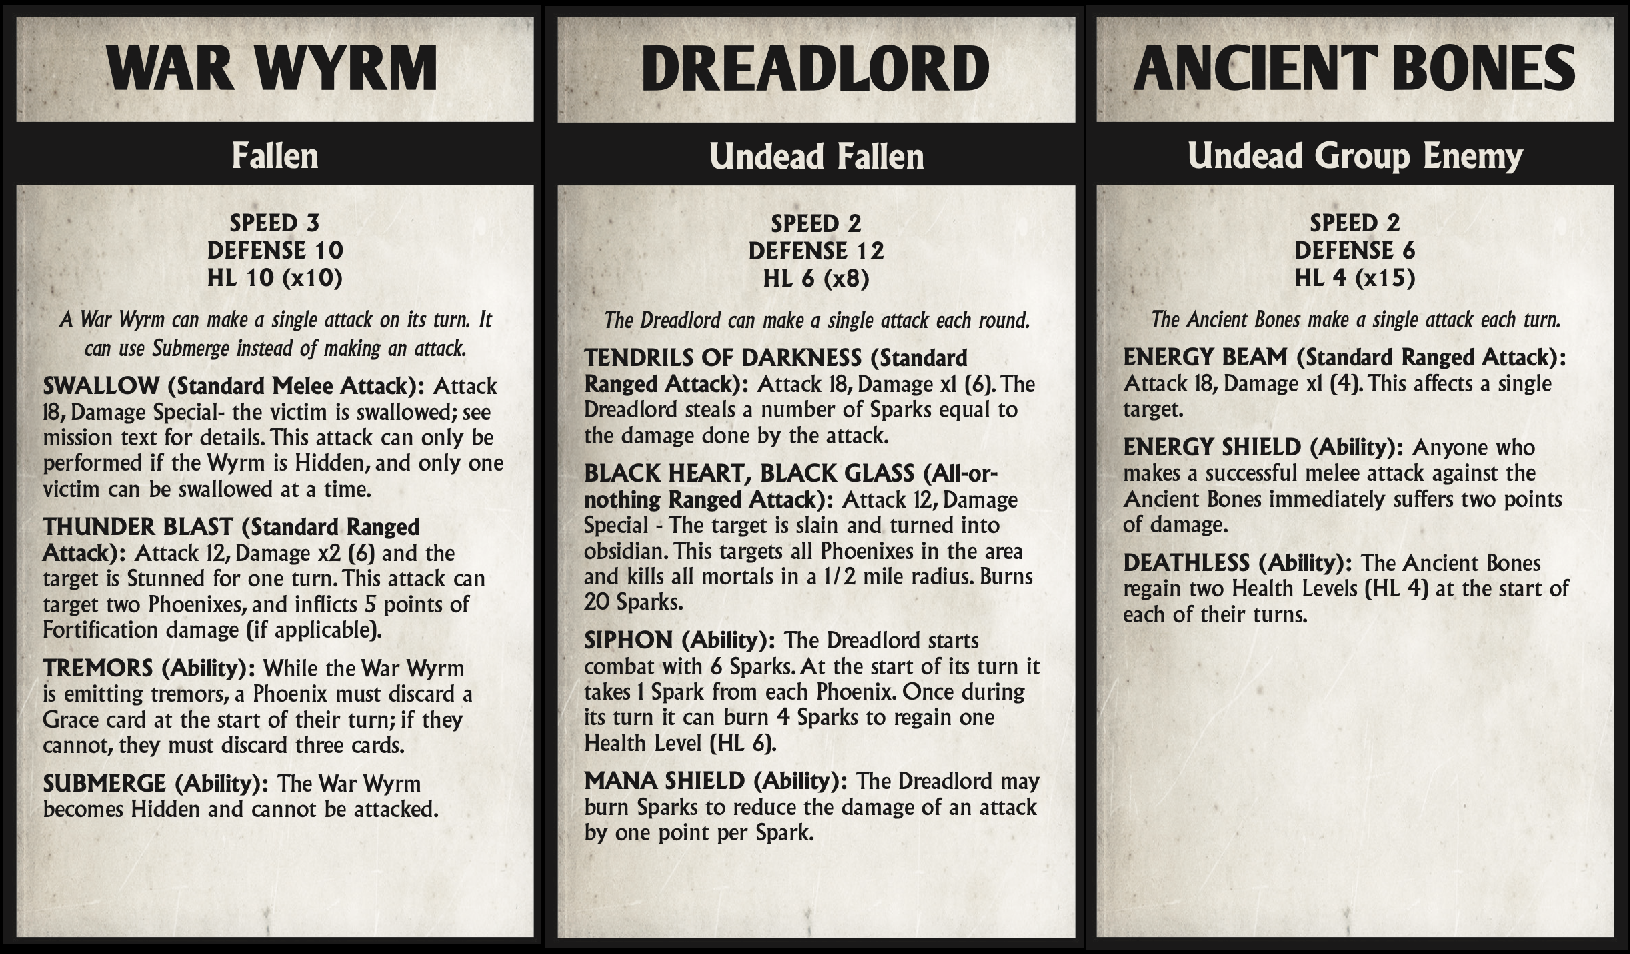
Arrange the Phoenixes in a two by two formation on one side of the play space. Establish who (if anyone) is going to guard the terrified envoy Tal. Set the War Wyrm in the center, with a single HL 10 token. The area is the Capital Square, and includes the following environmental elements: Rubble, Collapsing Building, Glass Statue, Gas Lamp, Fountain, Hand Cart.
FIGHTING THE WYRM
The Phoenixes get the first action. If they study the War Wyrm, they will realize that it’s a statue… it doesn’t have obsidian skin, it’s simply been transformed into obsidian just like the mortals. If a Phoenix attacks it, they will realize this as soon as the attack is resolved; if the Health Level is removed, the statue breaks into pieces. In any case, after a Phoenix resolves the first turn, the real threat appears. There is a new tremor, more intense than before, and suddenly the ground shatters beneath the Phoenixes as a second War Wyrm rises from the ground.
The street shatters beneath you as a second creature bursts up from beneath your feet. There is a crystalline sheen to this creature’s armored skin, but it isn’t made of glass; the texture of its armored plates reminds you of the crystal swarmers you fought below Kor Aton. It lashes out with its tentacles, seeking to trap and engulf you before you regain your footing.
Each Phoenix must immediately discard one Grace Card to maintain their footing on the suddenly uneven terrain. If they don’t have any Grace cards, they must discard any three cards. After this is resolved, the War Wyrm targets one of the Phoenixes with its Swallow attack. Resolve this attack, and then add HL 10 tokens to the War Wyrm until it has a total of ten Health Levels. The real battle is on! The War Wyrm acts with a Speed of three. On subsequent turns, it will attack using its Thunder Blast; this is a magical attack that it projects from its tentacles.
Swallowed?
If the Wyrm’s initial attack is successful, it snatches one of the Phoenixes and swallows them. The trapped Phoenix suffers two points of brutal damage at the start of every Phoenix’s turn; each turn, they can negate this damage by burning two Sparks. While inside the Wyrm a Phoenix can’t be attacked and is immune to its Tremors effect. There are two ways to escape the Wyrm. A Phoenix can make a Grace Spread (Difficulty 30; Athletics, Acrobatics, Fire) to crawl or burn their way out. Alternately, they can attack the Wyrm from inside. Its Defense is reduced to 5, and if they inflict two Wounds (removing two HL-10 counters) on it they are able to hack through its skin and escape.
Run Away!
If none of the Phoenixes are swallowed, they may choose to ignore the Wyrm and flee. Tal will encourage this, shouting “We’ve got to get to the palace! You need to protect the Emperor!” The Phoenixes may flee at any time; the Wyrm will continue smashing the city behind them. If they do this, they will quickly run into the Dreadlord and its personal guard. Continue to Scene Two, but take a moment to describe the Ancient Bones and add a few new city elements to the Torch as it occurs in a different part of the city. Glass Statues and rubble can be found throughout the area, but another area could have a Trash Barrel, a Merchant Stand, a Wagon, a Tavern Window, or any interesting city elements you can think of.
USING THE ENVIRONMENT
If a player comes up with a clever way to use the Collapsing Building in an attack, add five to the value of the spread and make the damage brutal. If the gas lamp is used to trigger an explosion, add five to the value of the spread and add a Burning condition to the target. The Glass Statue could be the remains of an innocent or the shattered obsidian War Wyrm.
THE BONES ARRIVE
At the end of the first cycle, there’s a new twist. Read or paraphrase the following.
As you struggle with the Wyrm, a squad of soldiers enter the square. But this isn’t the Imperial Army. These are Bones… but they aren’t like any Bones you’ve seen before. Their armor is an unfamiliar design, light plates of metal stamped with glowing runes. They hold long rods and wear bracers that seem strangely familiar, and they are surrounded by a pale field of violet energy. They don’t speak. They simply raise their rods as one and unleash a barrage of mystical energy, blasting at the Wyrm.
Set the Ancient Bones on the table with ten HL-4 counters and a single Shield counter. The weapons and bracers used by these Bones are similar to the tools the Phoenixes may have found beneath Westergate in The Summer Shore. However, like the other Bones the wing has encountered, these tools are in imperfect condition. Many are broken or missing pieces, and they are held together by the same ectoplasmic force that maintains the Bones. At your discretion, a functioning single rod and bracer can be recovered from the scene once the Bones are defeated.
Each time the Bones attack the Wyrm, they remove one Health Level (HL-10) from it. On the Wyrm’s first action following the arrival of the Bones it will use Thunder Blast. This time it targets a single Phoenix and the Ancient Bones; the attack removes two Health Levels (HL-4) from the Bones. The Bones will continue to attack the Wyrm until it is destroyed. If the Wyrm gets a second turn after the Bones have arrived, it will retreat from the battle by Submerging. If a Phoenix is still swallowed by the Wyrm when it submerges allow them to immediately take one bonus turn. If they escape in this turn they make it to the surface; otherwise they are lost and become an Attendant Spirit.
Studying The Bones
While the wing may have seen similar weapons in Westergate, nothing else about these Bones is remotely familiar. There’s no accounts of similar soldiers in lore. A capable Phoenix may want to study the spiritual energy of these Bones, to see if they can be exorcised like the ones they fought at Cartacia. This is an Extended Grace Spread (Difficulty 30; Spirits, Lore, Shadovar background). Shaman and Exorcist are worth +10 in this spread. Psychometry allows automatic success if the Spark cost is paid. In any case, once success is achieve read or paraphrase the following.
Like the other Bones you’ve encountered, these are the remains of soldiers animated by a driving spirit. You sense that this anchoring spirit is close - too close for you to sever the connection as you did in Cartacia. The spirit itself is difficult for you to grasp. You have a sense of tremendous age and of a determination to win a war, the same blind determination you felt in Hadon Pelagius. But there is something fundamentally different about this spirit. Pelagius didn’t know he was dead. This being has died and returned many times. It’s not simply that it doesn’t think that it’s dead; it doesn’t think it CAN die. Even as all this sinks in, you have a single, sharp insight: it is aware of you. It can feel you through this connection, and it is coming to destroy you.
Stand Off With The Bones
If the Wyrm is killed, its body begins to swiftly dissolve. If it submerges and escapes, the tremors subside and the passage collapses behind it. Read or paraphrase the following.
The Bones cease firing. They keep their rods at the ready, spreading out as human soldiers might to secure an area. What do you do?
The Phoenixes have one turn to act. They can speak to the Bones, attack them, or study them as described above. After this, proceed to scene two.
SCENE TWO: THE DREADLORD
Read or paraphrase the following.
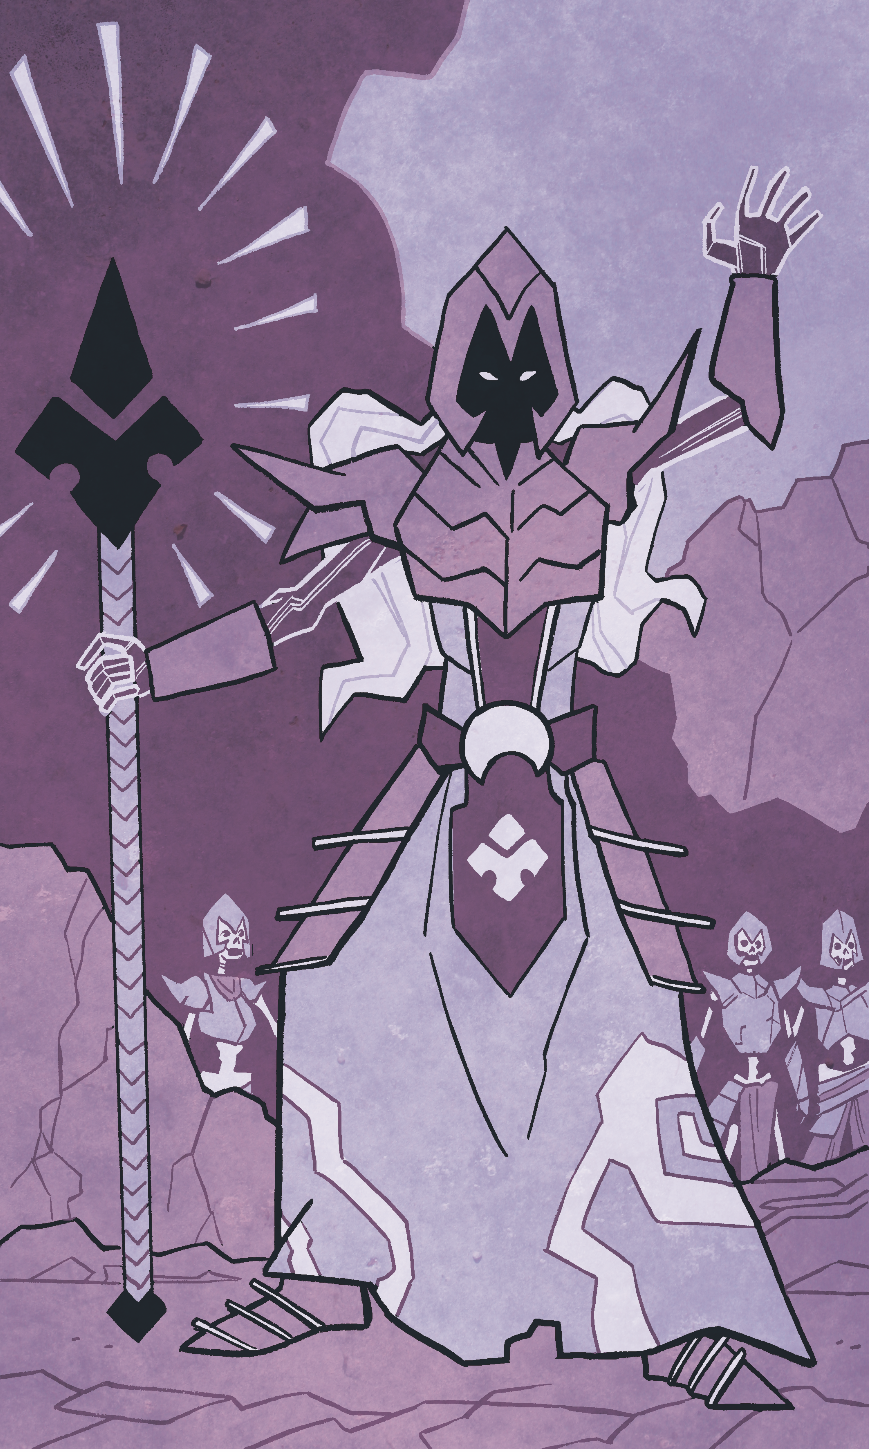
A new group of Bone soldiers enters the square, pouring out of an alleyway. There’s something else with them, a tall figure in robes and unfamiliar armor. Its face is hidden in the shadows of its helmet, and where you would expect to see flesh or bone you see shifting darkness. It holds a metal staff in one insubstantial hand, and tendrils of violet energy crackle around this… the same energy that turned hundreds of innocents into glass. As the Bones level their weapons in your direction, you hear words in your mind. “Pyrean traitors, hiding behind Guhani beasts. Prepare to die your final death.”
SETUP
Keep the Phoenixes in their current configuration. Place the Dreadlord next to the Ancient Bones. Add HL-4 tokens to the Ancient Bones until they have a total of 20 Health Levels, and place six Sparks on the Dreadlord. The area is still the Capital Square, with the same Environmental Elements from the previous scene. The Phoenixes get one turn while the Dreadlord is making its threat; the order of the battle is Phoenix, Dreadlord, Phoenix, Ancient Bones.
THE ANCIENT BONES
The Bones are straightforward opponents. They act as human soldiers might in an urban battle, taking cover behind rubble and blasting at the Phoenixes with their talon-rods. Their energy shields make it difficult to engage them in melee, but there are a number of ways to make a ranged attack. Any Phoenix can burn 1 Spark to make a ranged attack using a Talon; any appropriate Environmental Element can be used to make a ranged attack; or a Phoenix can improvise a ranged attack by describing a plausible action and discarding two cards. Like most Bones, the Ancient Bones are always regenerating and cannot be fully defeated while the Dreadlord is present.
THE DREADLORD
The Dreadlord is the bound spirit of a warlord of the Old Kingdoms. She was an Ascendant, a mortal who transcended death using the same techniques as the Phoenixes of Pyre. In her mind, the Phoenixes are ancient Pyreans who have sided with the Guhani - the creators of the War Wyrms - against the Heartland Alliance. Over the course of the battle she will curse them for betraying the Heartland. The blood of any innocents who die today is on your hands.
There’s two challenges to fighting the Dreadlord. The first is the way that she manipulates Sparks; the second is the need to acquire Ghostlight in order to harm her.
Stealing Fire
The Dreadlord is a warrior equipped to fight other Ascendants. While she can kill her enemies with physical force, the more insidious threat is her ability to drain and manipulate Sparks. She begins the battle with six Sparks. At the start of her turn, she drains one Spark from every Phoenix in the area. In addition, when she uses her Tendrils of Darkness attack - a blast of shadows from her Talon-staff - she drains a number of Sparks equal to the damage she inflicts with the attack. This is based on the damage dealt, not the number of Wounds the victim suffers: if she inflicts six points of damage on a Phoenix with an Endurance of 4, the attack will only result in one Wound… but she still drains the full six Sparks. She can drain Sparks even if her attack doesn’t do enough damage to result in a Wound.
Keep track of these stolen Sparks, which manifest as tendrils of violet energy crackling around her staff. She can use these with her Mana Shield to reduce the damage of an attack made against her. This is resolved after the Phoenix has completed a spread but before Wounds are inflicted, so the Phoenix can’t respond to her shielding; she gets the last word. As a result, she can generally spend just enough Sparks to drop the damage just below what it would take to Wound her. Her goal is to build up power for her Black Heart, Black Glass attack, so she won’t spend Sparks wildly; she’s willing to take a Wound or two to conserve her power.
Any Intellect-based Phoenix can recognize that she is building up power for this lethal blast. With an Intellect Spread (Difficulty 15; Arcane; Trump: Warlock) they can recognize that she needs to get to 20 Sparks, and that the blast has the potential to instantly kill them. Her staff is made of Pyrean steel and bound to her in the same manner as the other Bones are bound to their equipment; if it is taken away from her she can burn two Sparks at the start of her turn to recover it.
Ghostlight
Like Scartongue in Mission 3 and Hadon Pelagius in Mission 6, the Dreadlord can only be hurt by attacks that remind her of her past. The bad news is that the Phoenixes know absolutely nothing about her or how she died. The good news is that she died many times. They don’t have to single out her final death; they just have to match one of her defeats. As with previous Bone commanders, the maximum number of Wounds a Phoenix can inflict on the Dreadlord in a single turn is equal to the amount of Ghostlight they possess.
Here’s a few facts to work with.
- The Dreadlord’s name is Eulalia Corda. She is a Force Commander from Athana, one of the dominant states of the Heartland Alliance. Athana was located along the Summer Shore, and included what is now Westergate. Feuds were common within the Heartland Alliance, and Athana fought Pyre on multiple occasions.
- Over the course of her career, she has been killed by two Phoenixes. The first was a female Forceful named Tashea who fought with daggers. The Dreadlord respected her and they were allies in a number of battles, and she is still angry about the betrayal that resulted in her death. The second was a male Durant named Agash who fought with an axe; the Dreadlord only met him in battle and considers him to be a savage brute. Any Phoenix can get one point of Ghostlight by using the right weapon (dagger or axe). A Phoenix gets one point for having the right School (Durant or Forceful) and a bonus point if they have any other attributes that connect them to Agash or Tashea. Feel free to create additional ancient foes, but there shouldn’t be more than two matching Schools within the wing.
- She’s also been killed by a Talon-rod blast. This could require a Phoenix to use an Athanan rod (either recovering one from one of the Ancient Bones or using the one recovered at Westergate), or it could be that anyone can hurt her by burning a Spark to make a ranged attack with a Talon.
- Any Phoenix can get one point of temporary Ghostlight by taking actions that remind the Dreadlord of a previous battle (playing up any sort of details she drops about Agash or Tashea) or by calling out things that prove the situation isn’t what she thinks it is. A Phoenix needs to come up with a new story or concept each turn to keep this bonus.
No Skill Spread will reveal this information, though Brilliant Deduction or Psychometry can help. In general this will have to come through trial and error or by listening to the Dreadlord. She will address any Phoenix of the proper school or armed with the proper weapon as if they’re Agash or Tashea (even if this means she sees two Phoenixes as the same person). Ideally this should be an interesting challenge, as the Phoenixes provoke the Dreadlord to get her to reveal more about how she sees the world.
DEFEATING THE DREADLORD
Between the limitations of Ghostlight and the Dreadlord’s Mana Shield, it will be very difficult to defeat her. If the Phoenixes somehow accomplish it, they’ll hear her voice in their minds as her body dissolves - “I’m not limited as you are, Pyrean fools. You will die your final death at my hands.”
While this is possible, it’s more likely that the Phoenixes will have little luck fighting her. In this case, pick the moment when there is a peak in the battle - ideally just as the Dreadlord acquires her twentieth Spark and is preparing to unleash Black Heart, Black Glass. Read or paraphrase the following.
As the Dreadlord raises her staff, you feel a familiar tremor in the ground. Cobblestones shatter as a Wyrm bursts up through the ground beneath the Dreadlord. For an instant you see her caught in its tendrils, and then it pulls her into its gullet.
If the Phoenixes killed the previous War Wyrm, this will be a new one; otherwise if could have the scars to show that it’s the same one they were battling. If you’d like, you can give the Phoenixes one turn to interact with this Wyrm. After one turn, it submerges beneath the ground and disappears into the depths.
AFTERMATH
Whether the Dreadlord is defeated by the Phoenixes or snatched away by the Wyrm, the Ancient Bones collapse as soon as she’s removed from the scene. All in all, the conflict involved three War Wyrms and a hundred Ancient Bones. Both sides inflicted collateral damage, but they were primarily interested in fighting each other; the majority of the casualties were caused by the Dreadlord’s obsidian blast. Survivors are terrified and grieving, and Phoenixes could help with calming Grace spreads or a Healing spread. Beyond that, with the defeat of the Dreadlord the threat appears to be contained. If Tal is alive, he will urge the Phoenixes to get to the palace as quickly as possible. Otherwise a troop of soldiers will find the Phoenixes and offer to escort them to the palace.
SCENE THREE: THE GATES OF THE PALACE
Read or paraphrase the following.
The horns are calling the all-clear and people are cautiously returning to the streets. However, the palace is still prepared for war. Barricades of stone and steel block the gates of the palace. A score of soldiers stand ready to face any threat, and you see two dragon crews ready to flood the street with fire. The captain opens his mouth to challenge you, and then stops short. “It’s you!”
The captain on duty is Stefan Dukas, who was running the dragon crew in Chants & Whispers. His interaction with the Phoenixes should be colored by the events of that mission, but since then he’s become a believer. If his first meeting with the Phoenixes went poorly, he’ll apologize for his behavior - though if the Phoenixes sabotaged his dragons, this will be colored by anger at this reckless action. If Tal is still alive, he will hurry the Phoenixes through the barricade. Otherwise, Stefan will be the one who urges them through. “The Emperor and the Speakers were moved to the secure ward as soon as the horns sounded.” If Tal is alive, he’ll swiftly escort the wing to the secure audience chamber; otherwise the soldier Pardus (who may have helped the Phoenixes in Chants & Whispers) will enthusiastically volunteer. Once this is resolved, read or paraphrase the following.
The guide leads you into depths of the palace. The guard is on high alert, and you pass through half a dozen checkpoints as you descend into the vaults below the surface. At last you reach a set of double doors with an elite guardsman standing on watch. “Phoenixes to see the Emperor,” your guide says.
The guard looks puzzled. “What do you mean? He’s already inside.”
If questioned, the guard reveals that another Phoenix showed up five to ten minutes ago to see the Emperor and the Speakers. The guard knew a Phoenix was expected, and the man was very convincing. Having said that, he can’t remember much about the stranger aside from the fact that he was a Phoenix; while nothing about this feels out of the ordinary to the guard, the Phoenixes will recognize this befuddlement as the effect of a Shrouded with the Soon Forgotten Lesson.
The guard will rap on the door, which is barred from the inside. For a moment there is no response, but before a Phoenix can attempt anything rash the doors are unbarred and opened. If a Phoenix doesn’t wait, it’s a Strength Spread (Difficulty 25; Athletics) to break the bar and force them open. Either way, proceed to the next scene.
SCENE FOUR: OMEN AND THE EMPEROR
Read or paraphrase the following.
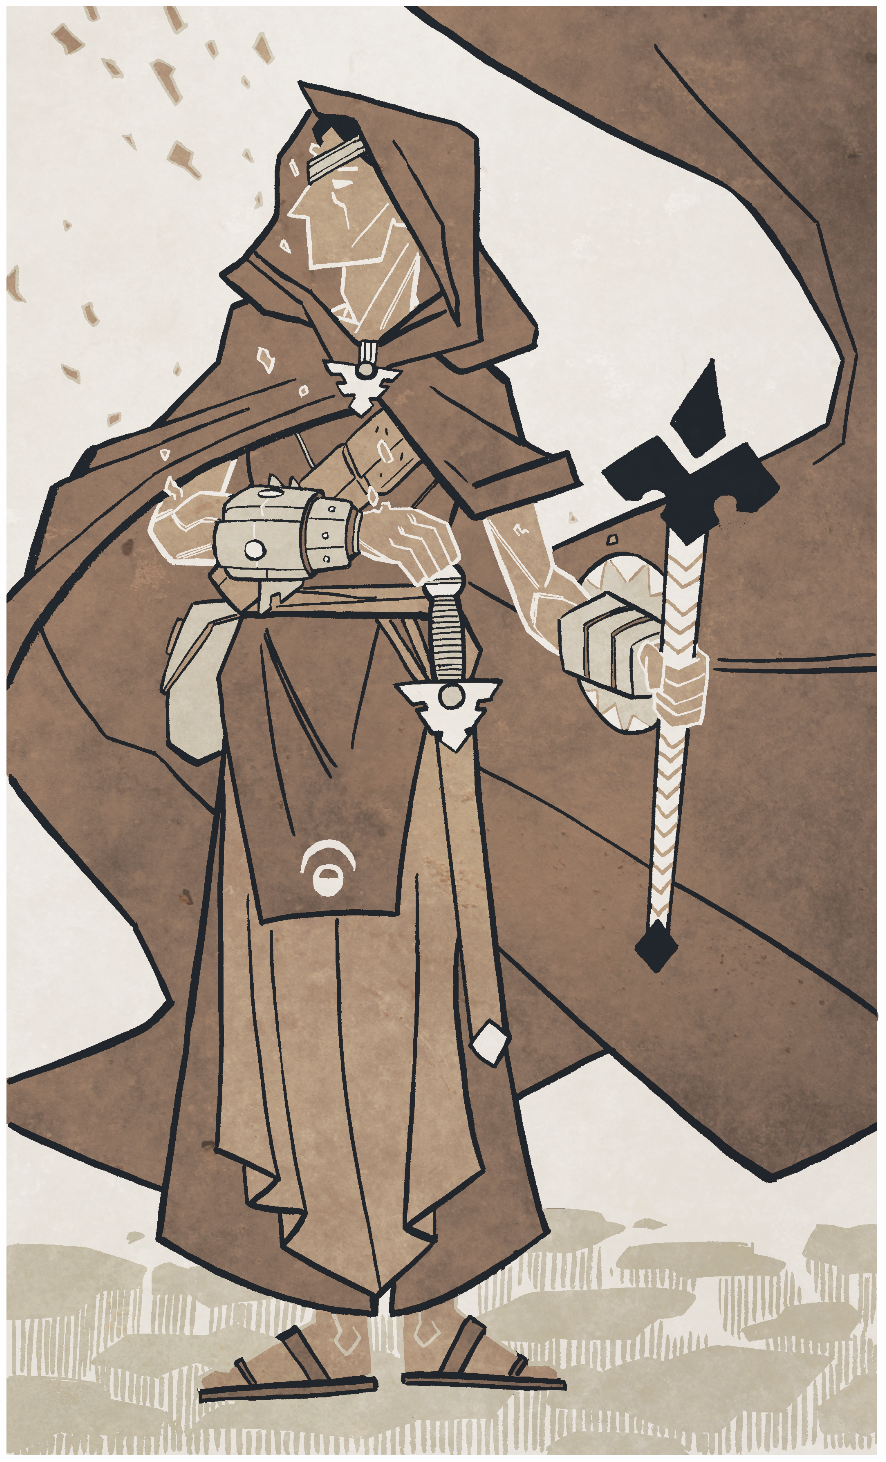
This meeting room may be in a secure vault below the palace, but it feels as luxurious as the throne room itself. The walls are hung with tapestries and maps. Light comes from a glittering chandelier. The table is polished grimwood inlaid with gold. Two guards flank the doors, standing aside as you enter. The group inside is a royal assembly. You recognize Emperor Maelan from statues and portraits. He’s young, just past twenty, and wears a simple gold circlet black and white silks. He’s accompanied by a young woman who must be Cassala Deosa, the Speaker for Ilona. The other Speakers are spread around the room: the grizzled Wynderi Speaker, his left lower leg replaced by an engraved stump; the Speaker for Skavia, an ageless man whose lower face is hidden by a mask lacquered in red and black; and the Speaker for the Grimwald, a woman in her middle years dressed in simple traveling clothes. All are listening gravely to a young man standing close to the Emperor. This stranger has the look of a Shadovar, with dark hair and sharp features. One eye is hidden beneath a leather patch. His hands are hidden beneath his long, flowing cloak… a cloak pinned with a brooch that is clearly a talon. You see the Shrouded symbol on his robes.
“I’m glad you could join us,” he says. “We all have much to discuss. I hope we can avoid violence; I’d hate to see the leaders of our Empire come to any harm.”
Omen wants to talk, but the wing may have other ideas. If they’re spoiling for a fight, you may want to point out that Omen isn’t in an aggressive posture; the mortals don’t seem to be afraid of him; and that there’s a lot of important people in this room who could be killed if combat breaks out. Despite this, Omen is expecting them to attack and is prepared; the moment a Phoenix prepares to make an Attack Spread Omen will take a hostage (see Hostages below). A Phoenix with the Perfect Reflexes lesson can make an attack before Omen can take a hostage; it’s up to you whether he simply stands and takes the attack, or if he uses his Dancing Puppet rune to defend himself. Even in this case, Omen will still try to get the wing to talk; the hostage is simply there to slow them down. If they insist on fighting without discussion, proceed to Scene Five.
As soon as the door to the chamber shuts, Omen murmurs something and it is sealed. This reinforces the door and soundproofs it; breaking down the door is a Grace Spread (Difficulty 40; Athletics, Spycraft, Destruction). “Now that you’re here, I don’t want anyone else interrupting us.”
TALKING POINTS
Read or paraphrase the following.
“I’m Omen of the Shrouded Legion. By now, I imagine you’ve heard of me? Whatever you may think you know, I assure you that we serve a common cause. We all want to defeat the Dread and secure the future of the Empire. Is that true?”
In playing Omen, bear a few things in mind. He is brilliant, patient and exceptionally charismatic. He has a knack for recognizing what people want to hear, and he’s been planning this meeting for some time. He won’t lose his temper or speak rashly. He has no supernatural power to sway the Phoenixes, but ideally you want to present him in such a way that they will at least think about what he has to say. By this point they are likely expecting him to be a classic evil mastermind; the goal is to present him as surprisingly down to earth. The evil mastermind part will come later.
If the Phoenixes are willing to talk, they will undoubtedly have their own questions and seek to guide the direction of the conversation. Given this, here’s a list of Omen’s primary talking points. The Emperor and the Speakers will contribute as well; see their descriptions in the sidebar to have a sense of what they might say.
- Omen’s primary point. The last three years have shown us a number of things. The Dread is growing stronger by the day. Attacks are coming more frequently and with greater power. Mortals cannot overcome the Dread alone. Look at their record facing the Chant or the Bones… and then consider the deeds of these few Phoenixes, who in the space of months have faced both the Bones and the Chant and triumphed. We can face the Dread and turn it back. We can save the Empire. But “we” in this case means Phoenixes. The Empire needs the Phoenixes, and the Phoenixes need the absolute and unconditional support of the Empire. It’s time to undo the mistake of the past. It’s time for the Emperor and the Speakers to do what must be done: to restore the Phoenix Imperium and abdicate their posts, helping to ensure a smooth transition of power.
- What? Why? Mortals will never have the power to face the Dread. And even if the Phoenixes defeated it for them, who knows when an even greater threat might rise? There are too many powers in this world that can’t be understood or controlled by mortals. Hadon Pelagius sought to restore the Talu House Gods; someone else could succeed. From Fallen incursions to inevitable uprisings, they will always be new forces of chaos in the world: only the Phoenixes can contain them. And to do this, Phoenixes must be recognized and respected. If mortal soldiers can contain a threat, they must be prepared to follow Phoenix orders without question or hesitation. The people must know that the Phoenixes are watching - both to grant them security and to dissuade those who would tamper with forces better left alone.
- Where have you been? I died. I was killed after failing to turn the Last Empress from this disastrous course. But I knew the Empire would need me again. They tell us Phoenixes can only come back seven times… but that’s a lie. I have unlocked the secrets of the Crucible. I have discovered our true potential. I have transcended death, and if you join me I can grant you true immortality.
- What do you want from us? Nothing more than what you’re already doing: fighting to protect the Empire from the Dread. I ask for your help in convincing the other Phoenixes to accept this transition… and for your loyalty to me as your emperor, of course.
- Why do you get to be Emperor? Because I have the vision required. I know more about the Fallen and the Dread than your Marshals can imagine. And because I can show you those who follow me the path to absolute immortality.
- So what are you doing here? If I wanted, everyone in this room would already be dead. I have no desire to throw the Empire into further chaos. I want the people in this room to recognize the need to restore the Imperium and to help make that transition as smooth as possible. I suspect I will want many of the ministers to remain in their current roles, at least until we identify Phoenixes better suited to their tasks.
All these points are, at least on some level, reasonable. Phoenixes may not ask all these questions, but this is at least a place where Omen’s thesis could appear to be sound. Mortals can’t face the Dread. The major victories have been due to Phoenixes. Perhaps placing Phoenixes in charge is a reasonable choice. In addition to this, Omen knows the Phoenixes. He’s been studying them over the last few weeks, and he has his own psychometric tools. He’ll raise points from each Phoenix’s backstory and history that help his case. This should certainly be creepy, but the goal is to actually encourage a real discussion on the merits of Phoenix rule. With that said, there are a few scattered questions where Omen’s answers aren’t quite so satisfying.
- So how do we become truly immortal? It’s not a secret that can be shared in a few words or moments. It’s something you’ll have to be taught, once there is time.
- What were you doing in Kor Aton? I’ve been traveling the Empire gathering information about the Dread and finding tools that will help us fight it. I learned that the Render of Veils allowed visions of the future, which seemed like a vital tool.
- What did you do to Mercy? What did you learn? The Render of Veils was dead; it needed to be bound to a Phoenix to be restored to consciousness. Mercy’s sacrifice was necessary. The information I gathered from the Render showed me one possible path to victory; I’m following up on some of the other leads and hoping that they bear fruit.
- What was that path to victory? It’s something best discussed by a council of Phoenixes; this is not the time or place for it. This is all he wishes to say at this time, but if people somehow push him to speak or use something like Brilliant Deduction, the path is to kill all mortals. He believes that if the world was entirely populated by Ascendants, the Dread would come to an end. In the worst case scenario this would mean killing everyone except Phoenixes; in the ideal scenario he’ll find a way to help other worthy people become Phoenixes.
- What happens after the Dread? Will you relinquish power? Will you place the same restrictions on magic and the like as the Phoenixes of old? Of course we will retain power after the Dread, and we will enforce the laws of old; it is the only way to keep people safe. Whether it happens in a decade or a century there will always be another threat, another Dread. Only Phoenix vigilance can counter such threats.
- What if mortals don’t want to be ruled by Phoenixes… like last time? I learned many painful lessons from the Civil War. Justice was too soft. She allowed the weeds to grow, and by the time she acted it was too late. The garden of our Empire will be kept in proper order, and no such rebellion will occur under my rule… no matter what it takes to prevent it.
- What if the Emperor and the Speakers won’t go along with your plan? I would prefer not to throw the Empire into chaos by decapitating its leadership, but if that turns out to be the only alternative, so be it. Chaos and panic will follow, and the Phoenixes will arise as the only possible unifying force.
- What if WE won’t go along with your plan? Then I’ll have to eliminate you, as well. And I should warn you that I have a weapon that can imprison your spirit. You can serve me and have immortality; or oppose me and face your final death.
These last few points cut to the heart of the matter, which could also come up if people ask if Omen killed the expedition in Kor Aton. Omen places minimal value on human life… so much so that he’s considering a plan that would exterminate humanity to end the Dread. He wants to create a perfect secure society, and if that ends up being a few thousand immortal Ascendants, that’s good enough for him. He considers humans to be flawed, greedy beasts. This is in part based on the horrors he saw fighting Hadon Pelagius and others the Civil War, but they go back far deeper than that. Omen is Shadovar, and he was alive when his people were massacred by the Talu and driven from their homes. He was always mystically gifted, and to punish the killers Omen created the Chant. After his enemies were destroyed, Omen was horrified at what he had done. He believes that humans are fundamentally evil and destructive, that they can’t be trusted with magic, that they will always unleash new terrors. In part this is based on fighting people like Hadon and the old Talu; and in part it’s because of what Omen himself has done. No mortal should have such power.
Beyond all this: Omen has helped spread seeds of the Dread. He has encouraged the spread of the Chant (you can decide whether he actually instigated the Darhold outbreak or simply helped set it in motion) and knew that bringing a War Wyrm to the Capital would trigger a response. He’s done these things both to study the Dread and to prove that mortals can’t face it.
Omen is a consummate liar. Deception is a Shrouded skill, after all. Catching him in a lie requires an Intellect Spread (Difficulty 30; Deception, Observation; Trump: Seen This before, Supernatural Senses). Deception is worth an extra +5 bonus for this purpose. Failure simply means that he seems sincere, but they don’t know if they can trust him.
WHAT HAPPENS NEXT?
It’s up to you to decide whether the ministers will be swayed. Most are at least willing to consider the idea, and it’s primarily a question of how the players fall on the matter. If the players are concretely on one side or the other and make compelling points, a majority of ministers will side with them. On the other hand, if the players are divided, consider each minister and decide how they will fall.
People may wonder how Omen intends to enforce this agreement. Can’t they just agree to his terms and leave? It’s not quite so simple. Omen isn’t here alone; he’s brought Fallen friends. When it comes time to discuss terms - or if anyone asks how he’ll enforce things - he draws a old coin from a purse and throws it in the air, whispering “Attend me” in Pyrean. There is a sudden sense of a presence in the chamber, and Crios Ruin turns pale. Read or paraphrase the following.
“We don’t have time for treaties, and I couldn’t trust such matters to faith. So I’ve brought along a friend, the Sealer of Vows. Hold his coin as you swear your oath, and he will make sure that you live up to your promises.”
With an Intellect Spread (Difficulty 20; Arcane, Lore, Spirits; Trump: Shaman or Warlock) a Phoenix can verify that this is the case. The Sealer of Vows is a variant of the Puppeteer; if someone breaks their vow, it can possess them for up to a year and force them to act in a manner that fulfils their promise. There’s no easy way to break the connection once it is made. They don’t know how the effect would work on a Phoenix, and it’s up to you to decide if it would have any effect; but at the worst, any effect would only last for one lifetime.
So now the stakes are established. Is anyone willing to agree to Omen’s terms? If not, he makes clear that he is willing to kill everyone in the room and find a way to piece things together from the ashes. “After all, I hear the Empire is a Phoenix.”
Hostages
The first time a Phoenix considers an aggressive action, Omen moves with supernatural speed. He grabs a mortal, and sets the blade of his sword against their throat. “Please, let’s not do anything we’ll regret.”
This is the reverse of the Buddy System. While Omen has a hostage, if he takes more than one Wound from a single Attack he can have the hostage take the second wound. Furthermore, at any time on his turn he can choose to kill the hostage as a free action. He’s fast and perceptive, and there’s very little way to get the hostage away from him safely. If someone has a good idea you can let them try it as a Grace Spread (Difficulty 40; Specialty depends on the nature of the plan). If they fail, Omen has the option to kill the hostage; you can warn them of this and the high difficulty before they begin.
It’s up to you to decide who Omen will grab. He’s unlikely to take the Emperor, as he doesn’t want to kill him right away. If he takes Cassala Deosa, she’ll remain calm as long as conversation is going on… but when things get tense she’ll stab him in the wrist with her hidden blade and break free. Don’t mess with the Deo Talu.
Omen doesn’t want to fight. Once he’s secured a hostage, he’ll still try to push back to conversation. But if people aren’t willing to accede to his demands, it will come down to combat.
SCENE FIVE: FIGHTING OMEN
Read or paraphrase the following.
“I’m sad that it’s come to this.” Omen’s cloak unfurls around him, as if caught in a ghostly wind. His skin takes on an iridescent sheen. He has three talons - his cloak, a short sword, and a bracer - along with an assortment of pouches. He’s also holding a rod of Pyrean steel similar to those used by the ancient Bones. A sharp sliver of metal floats suspended from one end, and you can see that it’s covered with runes.
Unless the Phoenixes are willing to accept Omen’s vision for the Empire, combat is inevitable.
SETUP
Arrange the Phoenixes as befits their actions in the previous scene. Set Omen in the center of the play area. The area is the Conference Room and includes the following environmental elements: Ornate Tapestry, Wooden Chair, Crystal Chandelier, Quill Pen, Fancy Table, and Long Mirror. If the Phoenixes initiated combat, they get the first action (even if Omen grabs a hostage); Omen acts on the following beat.
Omen intends to kill the Imperial leaders; divide them up among the Phoenixes using the buddy system. In addition, there are two soldiers and the Guide. Any soldier (including Pardus, if he’s the Guide) can provide a +2 bonus to one attack per turn when used as a buddy. If Omen has a hostage, that individual can’t be taken as a buddy.
USING THE ENVIRONMENT
All of the environmental elements are fairly straightforward. If Omen is Hidden, a table or a tapestry could be used to justify attacking him even while he’s invisible.
FIGHTING OMEN
Omen is a deadly foe with a host of tricks up his sleeve. Here’s a few things to keep in mind.
- An attack that only removes HL 4 Health Levels from Omen is intercepted by his cloak and allows him to become Hidden. The room is sealed, so he can’t leave; but it lets him launch a deadly follow-up attack with a +6 bonus.
- Omen’s goal is to kill the mortals. Thus he is looking for opportunities to inflict two wounds on people, and will target people who appear to be vulnerable. Once he’s killed someone’s mortal buddies, Omen will turn his attention to a Phoenix still guarding a mortal. He may kill a Phoenix early on as a show of strength, but it’s not his goal. He will mock the Phoenixes as he kills the mortals. Don’t you see? They can’t survive the battles that lie ahead. This is a point where he could be drawn into revealing his greater design, if he hasn’t already: we’ll only have peace when they’re all gone… when only we immortals remain.
- His Rune Ink abilities give him an assortment of options. He’ll save his passive tattoos for desperate times, but he’ll be quick to use his bonus attacks. If there’s a Bitter in the wing, Omen will target them with Sangrite Venom, as they will be most vulnerable to its effects. Be sure to highlight the rune vanishing from his skin when he uses one, as well as roughly how many he has remaining; it should be clear he’s burning limited resources.
- He has his rod, which he can use to trap the spirit of a Phoenix, but he’d prefer to keep it as a threat than to use it… in part because it can only hold a single Phoenix. He won’t use it until at least one Phoenix has died. He will threaten them with it, brandishing it and saying If I kill you with this you will never return. A Phoenix killed with the rod won’t return as an attendant spirit unless a second Phoenix is killed with it, at which point the previous prisoner will be released.
Summoning Fallen
Omen has an assortment of Fallen he can command to do his bidding. These are bound to his Talon Bracer, and he can only make use of one at a time. Omen can release a Fallen on his turn; it then remains present and in effect until it is banished, at which point Omen can release another. Banishing one of the Fallen is an Extended Grace Spread (Difficulty 40; Spirits, Arcane, Lore; Trump: Warlock). Warlock is a Trump Trait, as Omen has used Skavi techniques to bind these Fallen; Shaman or Exorcist are each worth +5 to the spread, and Crios Ruin can also add 5 to a spread. Details on his Fallen can be found in Mission Reference.
Defeating Omen
Initially, Omen enjoys the battle. It’s been centuries since he’s faced such a challenge. The first time he kills a Phoenix he’ll say Back to your flame, my friend. Take some time to consider all I’ve said.
If the Phoenixes manage to seriously injure him, he will still maintain his arrogant charm. What do you expect to accomplish with this? I’m beyond death. If he is defeated through brute force, be sure to highlight his supernatural endurance and the amount damage he can sustain before falling. In his final moment he will smile at the Phoenix who kills him and whisper Be seeing you as he dissolves into ash.
The most effective way to defeat Omen is to use his own binding rod against him. Disarming him requires a Grace spread (Difficulty 30; Athletics, Spycraft). Superhuman Strength, Supernatural Reflexes are worth +5 to the spread. If the Phoenix is protecting Cassala Deosa, she provides a +2 bonus; she knows how to distract an enemy. Once a Phoenix has the rod, Omen will do everything he can to kill that character; if he succeeds he reclaims the rod. A Phoenix wielding the rod deals brutal damage. If Omen loses his last 6-pt Health level to an attack made with the rod—or if he loses a 4-pt level when he has no 6-pt levels remaining—he howls in fear and frustration. His body dissolves into a cascade of burning embers and those are drawn into the rod. No! Nooo! You need me. You’ll seeeee….
An alternative is to restrain Omen in a mundane fashion, but he is a powerful Shrouded, strong and fast. He cannot be contained as long as he has Health Levels with a value of 6. If he has lost all of these levels, you can evaluate any plan to contain him and rule as you see fit. However…
Omen has no fear of death and can will himself to die. If he is trapped through mundane means, or if all of the mortals die, he will smile as he dissolves into ash. I’ve said what I came to say. I’ll return to claim my throne.
AFTERMATH
If Omen is bound or dies (whether by his own hand or through the actions of the wing), the door bursts open and soldiers rush into the room.
- If any of the leaders of the empire survived, they will ask the Phoenixes to deal with the monstrous forces attacking the city. It quickly becomes clear that the wyrms withdrew when Omen died, and the Bones vanished once the wyrms were gone.
- If the leaders were all slain, the soldiers will attempt to arrest the Phoenixes. If they choose to resist arrest, they can easily do so, but then they will be blamed for the murder of the Emperor. If they allow themselves to be taken into custody, things will eventually be cleared up.
In either case, someone should make a Grace Spread to see how convincingly they explain what happened and their role in it. Diplomacy and Leadership are the strongest specialities for this, though Deception or Fear could apply based on the approach the speaker takes.There’s no set goal, but the degree of success implies the overall tone at the end of the mission. With a result of 20 or better, the people are reassured. Even if the Emperor died, the Phoenixes can prevent chaos and panic. With a result below 20, things feel uncertain and unstable.
If all of the Phoenixes who choose to oppose Omen die, they are reborn in Pyre. Omen has taken control of the Aerie in the Capital and the Phoenixes can’t return directly to the city. It soon becomes clear that Omen has been appointed Emperor, using the Sealer of Vows to bend any surviving leaders to his will.
Regardless of the outcome, this is where the mission concludes. Either the Phoenixes remain in the capital, helping the surviving leaders—or all of those who have chosen to oppose Omen are reborn on Pyre, unable to return directly to the Capital.
EPILOGUE
This mission is designed to serve as a season finale—a point at which to stop or pause a Phoenix campaign. If Omen defeated the Phoenixes there’s a dramatic shift. But even if the Phoenixes were triumphant, it’s time to reconsider their role within the Empire—and to face the Dread in a more coordinated fashion. Consider the following outcomes.
Emperor Survived, Omen Bound. This is the ideal outcome. The leadership of the Empire remains intact and the threat posed by Omen has been eliminated. But the questions he raised remain. It is clear that mortal forces can’t effectively counter the Dread—and assuming they were victorious at Cartacia, that the Phoenixes can. Discuss the situation with the Wing. The Empire wants to recognize Dawn Command and bind it to the Imperial army, coordinating operations as best as they can—but also placing the Emperor as the final authority. Will the Phoenixes accept this and work for the Empire? Or do they believe that Phoenixes should remain an independent force—or even question whether a Phoenix should be emperor? If the player Phoenixes have different opinions, you can invoke different Marshals as supporting them. This may vary based on the player’s interactions with the Phoenixes over the course of the campaign, but a simple option would be to say that the Shrouded Marshal Winter is willing to submit to Imperial rule and may already have made some arrangements with the Deo Talu or other houses; that the Elemental Marshal Cinder will accept the arrangement but feels that his first duty is to the Imperial Flame; and that the Durant Marshal Honor remembers the civil war and is reluctant to submit to Imperial oversight. Honor could question whether Omen’s idea of a Phoenix Emperor was a good one—even if Omen was clearly the wrong choice for the role. The point is that the players should have the final say, but that their decisions are echoed by the choices of the Marshals as well as the efforts and counsel of the player characters. If they accept the arrangement, Phoenixes will have the full support of Imperial forces going forward, and Winter and Honor will work directly with Imperial leadership. Should they refuse oversight, the common people will support the Phoenixes but they won’t have authority to command Imperial soldiers… and there will be a lingering thread of concern that the Phoenixes are themselves a potential threat. And should the Phoenixes feel that a Phoenix should lead the Empire, Maelan Dolanti can be convinced to stand down temporarily—with the belief that the Phoenixes will relinquish control once the Dread has been contained. But will that happen? And, of course, if a Phoenix is going to be Emperor, who will it be? It COULD be one of the Marshals, but on the other hand, they are good at their jobs and have important jobs to do. Could a member of the wing be considered for the role?
Emperor Survived, Omen at Large. If Omen was slain but not bound, Dawn Command will make capturing this rogue Phoenix a top priority. The basic question above—how will the Empire and Dawn Command work together—remains, but at the least a wing of Phoenixes will be assigned to guard the Emperor. And this would be a stronger case for a Phoenix temporarily taking over the position of Emperor “until the threat is dealt with.” Regardless, Dawn Command will have to deal both with the escalating Dread and with Omen’s ongoing schemes.
Omen Triumphant. If Omen succeeded, by the time the wing returns he will have been appointed Emperor. He has addressed the people of the Capital and rallied their support. He sends a message to Dawn Command informing them that he is in control, and that should he die at the hands of a Phoenix, he will simply return again… and a terrible Chant outbreak will destroy the Capital. The Marshals decide that the best answer for the moment is to work with Omen to fight the Dread, while watching him and considering next steps. Omen wants to defeat the Dread, and it could be that he will be an effective leader. However, if the war goes poorly, the wing will eventually learn of his doomsday plan to eliminate all mortals. If this occurs, the first question is whether any other Phoenixes support Omen. Given time, he may manage to win some of the Marshals or wings to his side! If so, the wing will have to find a way to defeat Omen, reunited Dawn Command, and then to finish the war against the Dread. If some members of a wing support Omen and others don't, they will have to decide which path to follow when cooperation becomes impossible; one side will become NPCs, and they can make new characters that support the majority opinion.
This is the last Phoenix mission we have planned for the foreseeable future, so it’s up to you to chart a path into the future. But who knows what could happen in the days ahead!
MISSION REFERENCE: THE SIEGE
Imperial Leaders
These are simple thumbnails of the Emperor and the Speakers. Expand them as you see fit, or call on the players to add details.
MAELAN DOLANTI, The Emperor Buddy Stats: -2 Defense
A young Ilonan man. He is brave, charming, and determined to do what’s best for the people of the Empire. However, he is young and facing an enemy he can’t understand or defeat. He’ll respond poorly if it becomes clear that Omen is willing to slaughter innocents, but unless that point is made he’ll serious consider abdicating the throne. He was recently betrothed to Cassala, and loves her deeply.
CASSALA DEOSA, The Speaker for Ilona Buddy Stats: +2 Attack/Defense
An Ilonan woman in her late twenties, Cassala is the youngest Speaker in the history of the Empire. She is a prodigy with a remarkable gift for oratory and philosophy. She is also a member of the Deo Talu, the crimelords of Cartacia. While she chose not to pursue the family business, she carries a hidden blade and knows how to use it. Cassala will speak passionately in defense of humanity and the current Imperial order. If no player asks the difficult questions (What will happen after the Dread is defeated? What if people challenge you again?) she will bring them up. She truly believes in the principles of the Empire and that its government can serve the needs of the many, and she believes that humanity will find a way to triumph over the Dread without surrendering freedom to the Phoenixes.
CRIOS RUIN, the Speaker for Skavia Buddy Stats: +5 to Arcane
It’s impossible to guess Ruin’s age beneath his cowl and red and black mask. He is always calm and speaks quietly. He strongly opposes Phoenix rule; he believes that it’s time for the Empire to embrace the path of magic, to authorize research into the old ways and forge new weapons to face the Dread on its own terms (which Omen is certain would end in disaster). Crios is tied to one of the ancient families of Skavia, a family that claims to have Fallen blood. In addition to serving as Speaker he is the Minister of Secrets, the foremost expert in the Empire on arcane matters. Anyone guarding him is considered to have the Arcane Specialty; anyone with this or a similar Specialty receives a +5 bonus to any spread where Arcane knowledge could apply.
OVISSA, the Speaker for the Grimwald Buddy Stats: No Bonus
Ovissa is a woman in her forties, and comes from the borders of the Grimwald; she isn’t part of one of the Treefolk tribes, though she respects their ways. She is pragmatic and sensible, and more likely to raise common sense questions or objections than to produce impassioned rhetoric.
HAKI BAADA, the Speaker for the Wynderi Buddy Stats: -2 Defense
Haki Baada is a crusty old salt who claims to have lost his leg in his days as a privateer; in truth he lost it in a terrible accident involving a carriage, a horse, and three hundred pies. He is loud and passionate. He wants vengeance for the Wynderi and he wants the Dread driven from the lands of his people. Omen is willing to promise both of these things, and Haki is willing to listen.
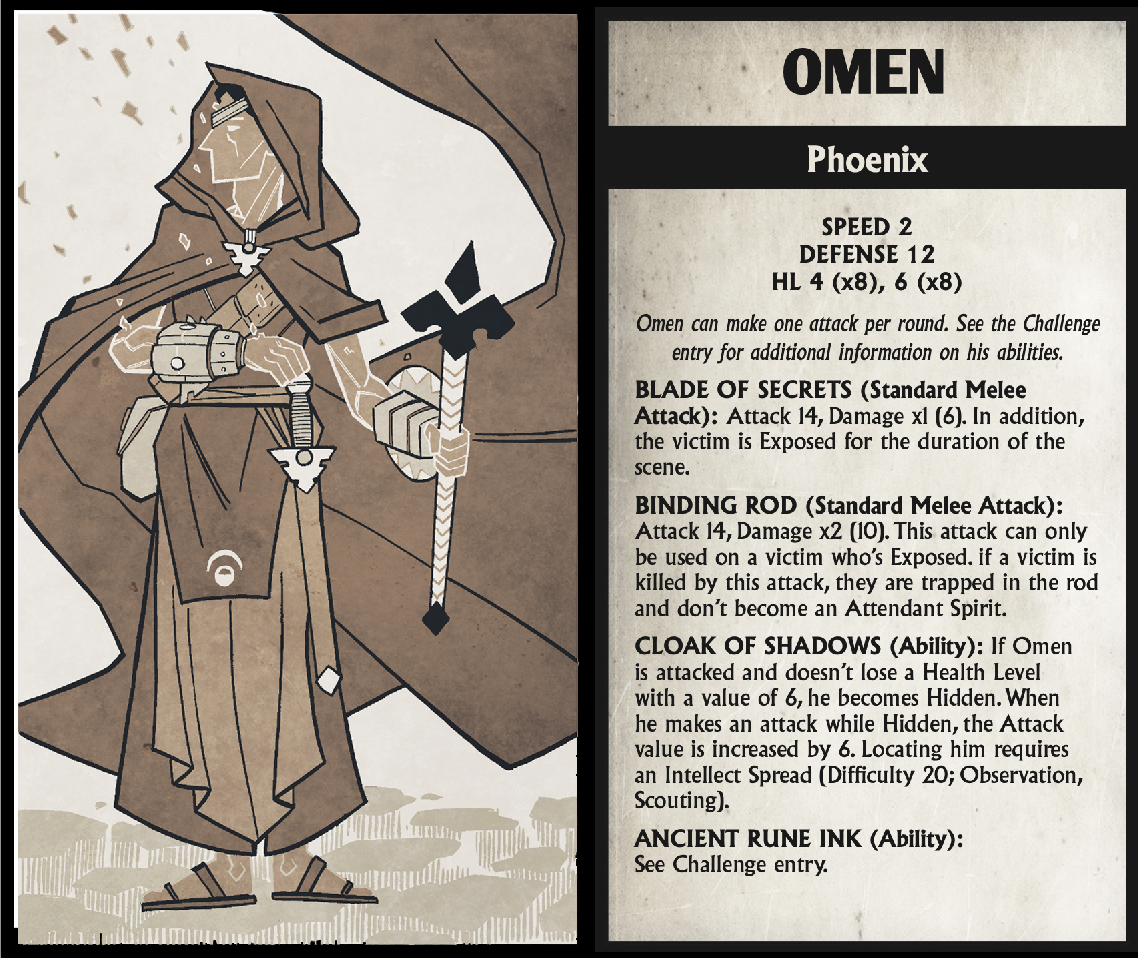
OMEN (Phoenix)
Omen can make one attack and use one active Rune Ink ability each round.
Ancient Rune Ink (Ability): Omen has a set of mystical tattoos similar to those granted by the Rune Ink Lesson, though his are considerably more powerful. He can use each Rune once in the scene. He can use one active rune per turn; he can use the passive runes at any time, even in response to an attack.
- Broken Hourglass (active): One Phoenix loses half of their current Health Levels (round up). This doesn’t hurt mortals.
- Constellation of the Blindfold (active): One Phoenix discards their hand. Search through their deck and choose a new hand for them, then shuffle their deck.
- Sangrite Venom (active): Resolve as an all-or-nothing ranged attack; Attack 16, Damage special - the target adds one Affliction to their unused deck. Whenever that Affliction is triggered, the victim takes one Wound and Omen recovers one Health Level (HL 6).
- Dancing Puppet (passive): One mortal takes an attack that was intended for Omen.
- Grail of the Atavi (passive): Omen regains four Health Levels (HL 6).
Summon Fallen (Ability): Omen may have one Fallen ally at any time. If one is dismissed or banished, he may summon another. Banishing one of the Fallen is an Extended Grace Spread (Difficulty 40; Spirits, Arcane, Lore; Trump: Warlock). The Fallen cannot be fought physically, but their presence is obvious to any observer. Once Omen has summoned a Fallen ally, he must negotiate with that Fallen anew to regain the ability to summon it. In battle, Omen will summon his Fallen in the following order.
- Time’s Reaver. While this Fallen is present, time slows down for everyone except Omen. His Speed increases to 1, and the draw limit of all Phoenixes is reduced by one.
- Life’s Last Shadow. This preys on the mortals. It kills a mortal every three turns (starting three turns after Omen releases it). The effects are obvious, as the intended victim struggles with their shadow. If the intended victim dies before the Fallen kills it, it starts anew with a new victim.
- The Vizier of Maladies. At the start of each turn all members of the wing receive a new condition, in this order: Vulnerable, Enraged, Stunned (for one round), Bleed. Once these have been distributed, they suffer an additional Bleed at the start of each of Omen’s turn; once there are no more Bleed counters, they each suffer one Wound instead. The conditions remain until the Vizier is dismissed or banished, at which point they are immediately removed.
Thanks for your support, and I hope you enjoyed this return to Phoenix Dawn Command!